Users & permissions
Create and manage custom roles
Learn the steps to create, view, edit and delete a custom role.
Last updated
You can create custom roles with permissions that fit your institution's needs, then view, edit and delete them from the roles and permissions page.
Create a custom role
Click Create custom role at the top left of the page.
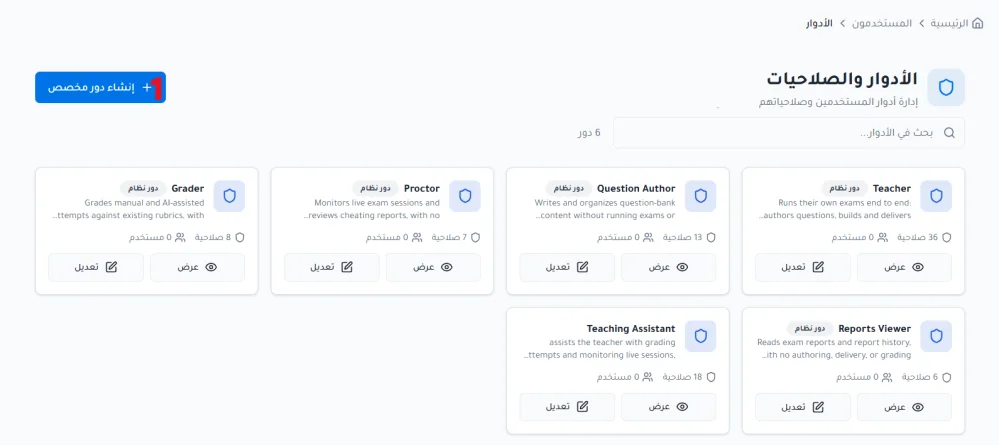
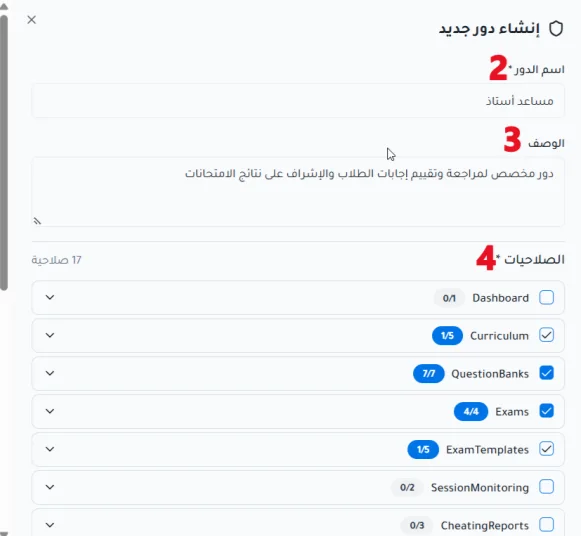
Enter the role name.
Enter the role description (optional).
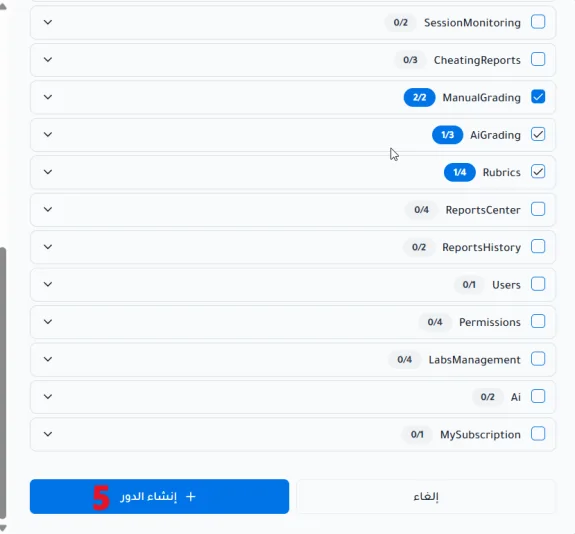
Choose the permissions you want to grant to the role from the available permission groups.
Click Create role to save it.
View a role
Find the role you need.
Click View on the role card.
Review the role's details and its linked permissions.
Edit a role
Find the role you need.
Click Edit.
Change the details or permissions you need.
Save the changes.
Delete a role
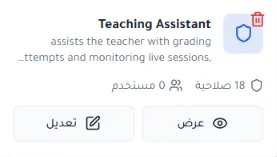
Find the custom role you need.
Choose the delete option.
Confirm the deletion in the warning message that appears.