Users & permissions
Add students
Learn how to add one student manually or import a batch of students from an Excel file.
Last updated
The Users page lets you manage all users in the system. When you click Add student, the system offers two options: individual add or bulk import.
Open the page
From the side menu, click Users and permissions then choose Users, then click Add student in the People section.
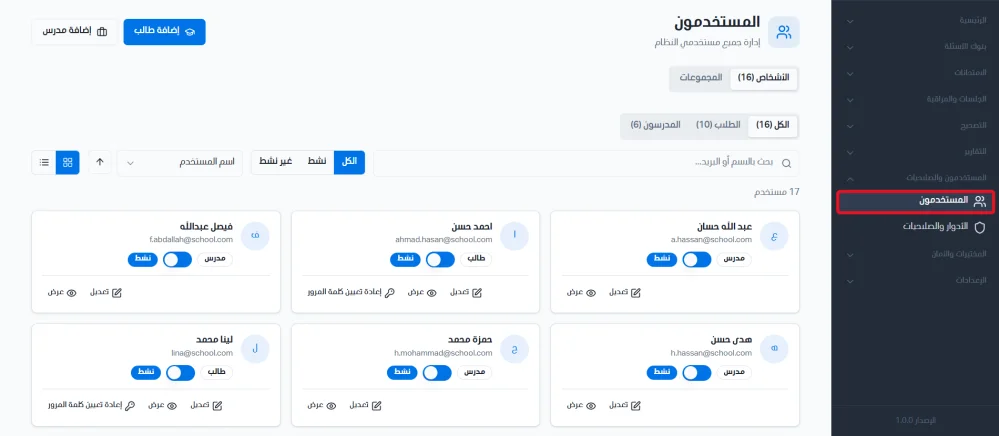
Option 1: Add one student
Enter the student's details in the following fields. Basic data:
Name: required field.
Email: required field, and it must not already be in use.
Password: required field.
Additional data:
National ID: optional.
Academic ID: optional.
Profile photo: optional, accepts jpg, png or webp up to 5 MB.
Group: optional.
Enter the student's details in the fields above.
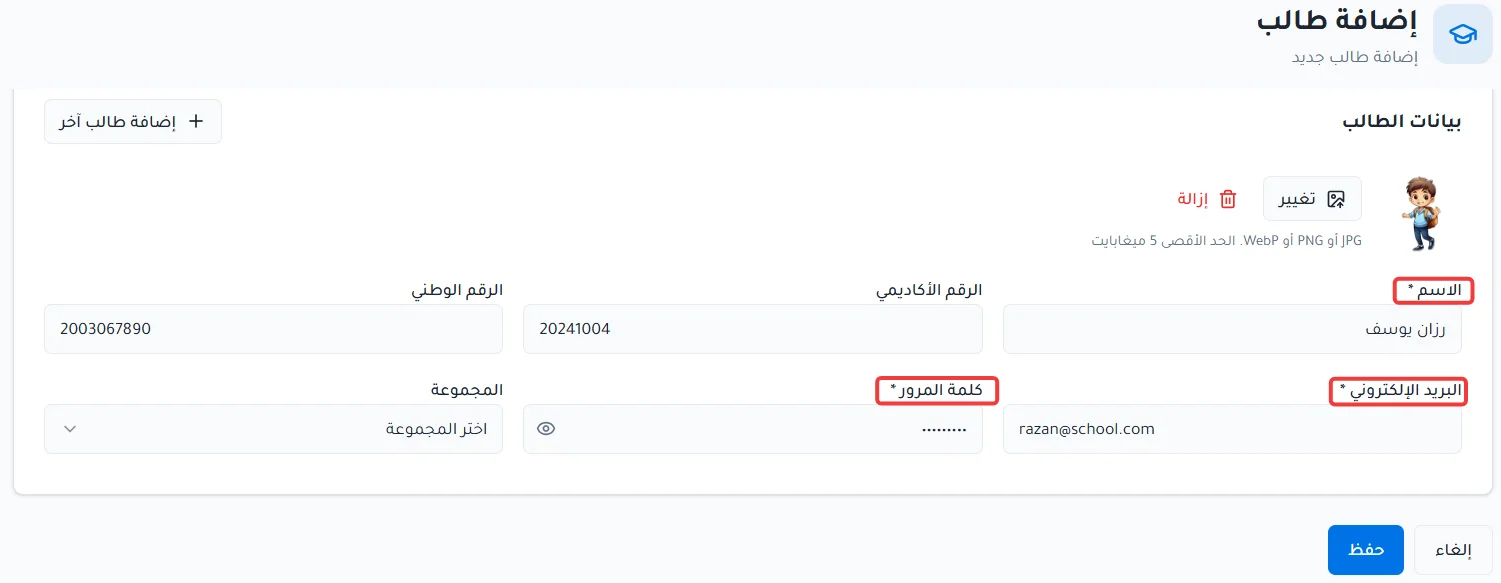
Click Save to add the student.
Option 2: Bulk import
This feature lets you add a group of students at once using an Excel file, instead of entering each student's details separately.
Click Download template. To make sure your data is compatible with the system, you must use the platform's approved template. The system downloads a ready-to-fill Excel file.
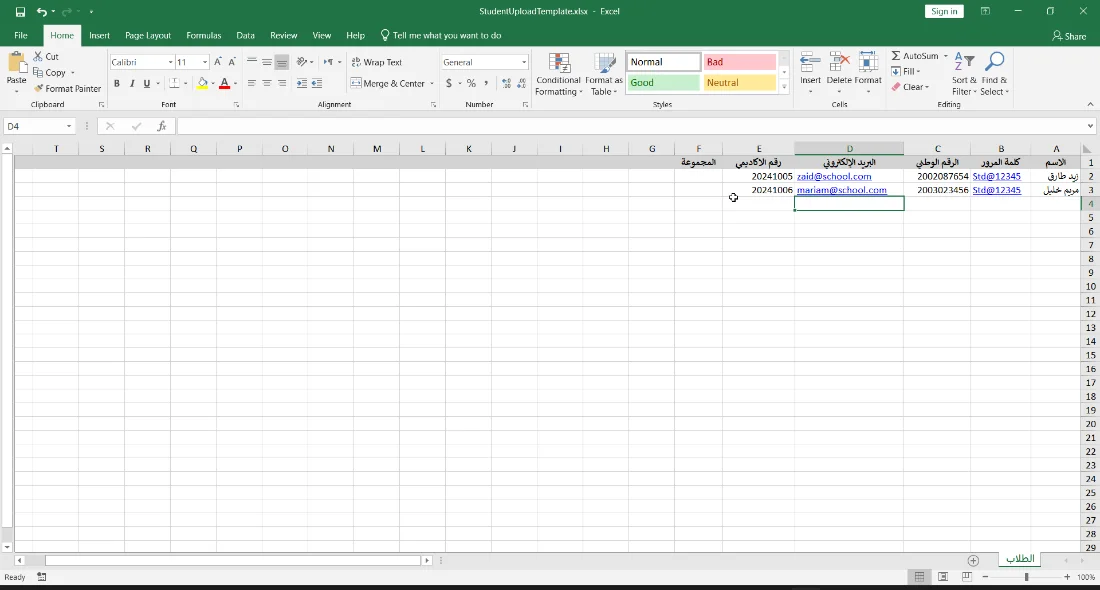
Open the file you downloaded and fill in the columns described below.
Return to the student import screen in the browser, click Choose file, then select the Excel file you filled in. The system supports xlsx and xls files.
File columns:
Name (required): the student's full name.
Password (required): the password for the student's account.
National ID (optional): the national identity number.
Email (required): the student's email, used to log in and receive notifications.
Academic ID (optional): the student's identification number.
Group (optional): the name of the group the student belongs to.
Make sure the same email is not used for different students.
Group names entered in the Excel file should already exist in the system, to avoid linking errors.
Make sure the file has no empty cells in the required fields.
Use the Excel template provided by the platform.
